Description
This article describes how to create a FortiGate-BYOL in AWS.
Solution
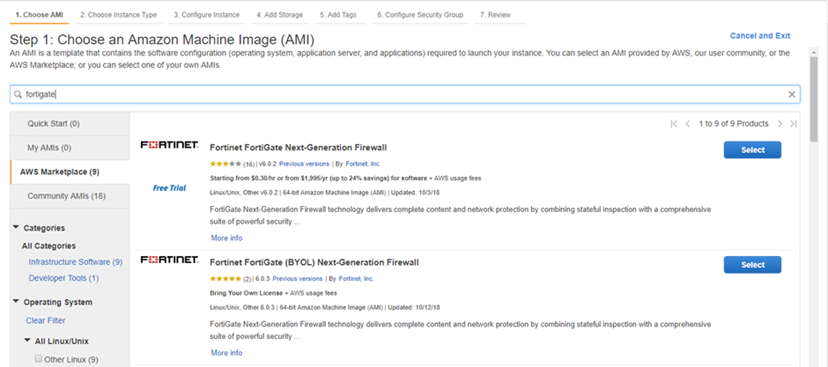
Step 1: Go to AWS Marketplace and search for “FortiGate”. Select “Fortinet FortiGate (BYOL) Next-Generation Firewall”.
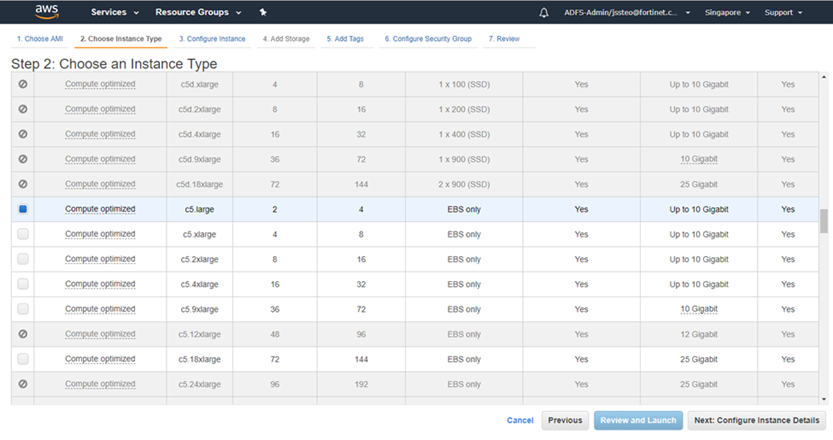
Step 2: For the instance type, Fortinet recommends C5.Large or larger.
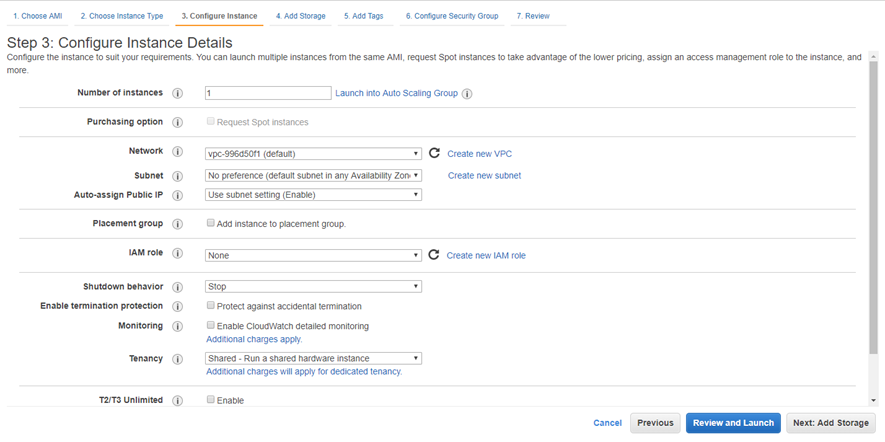
Step 3: Configure the instance details by choosing the correct Network, Subnet. To use a dynamic Public IP address, enable “Auto-assign Public IP”.
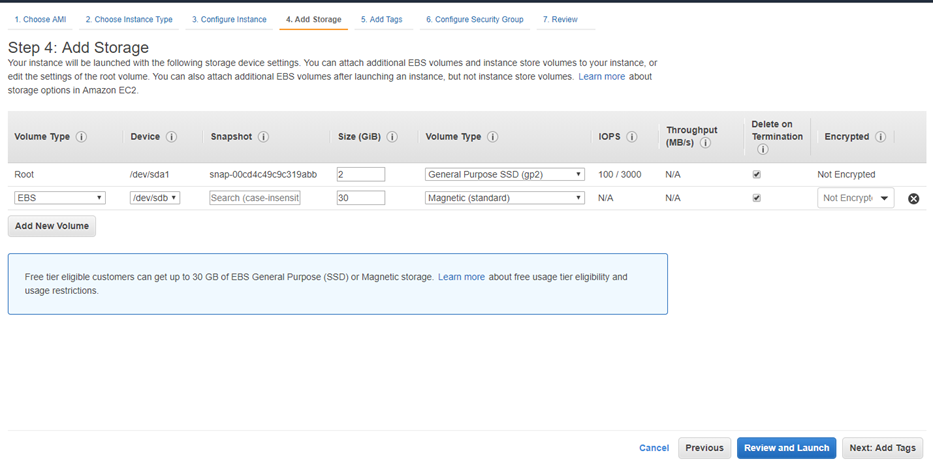
Step 4: Configure storage for the FortiGate.
Step 5: Add tags.
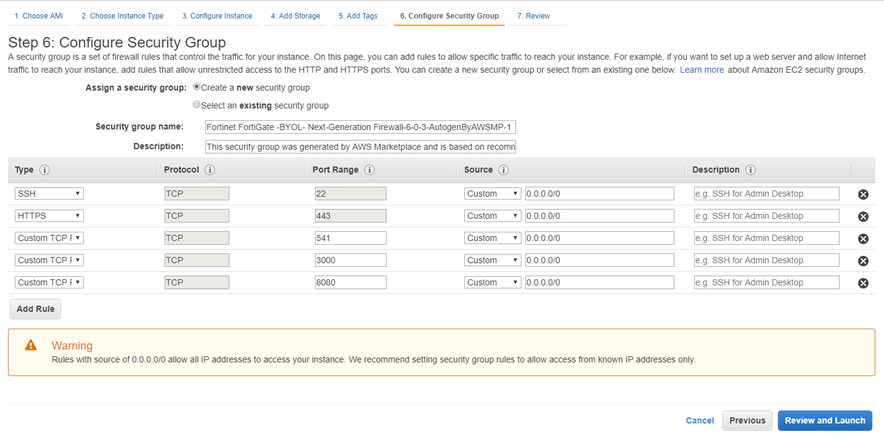
Step 6: Configure security group.
Step 7: Review and create the instance.
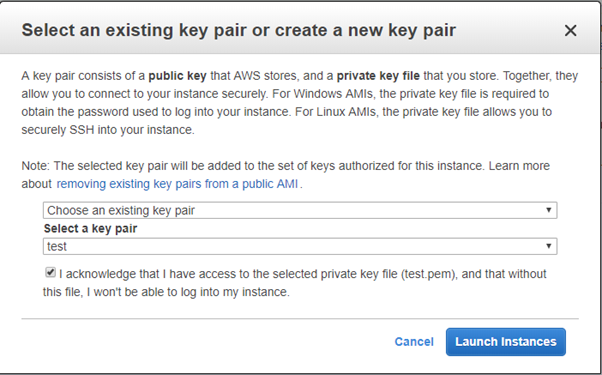
Step 8: It is require to choose a private key that will be stored in AWS.
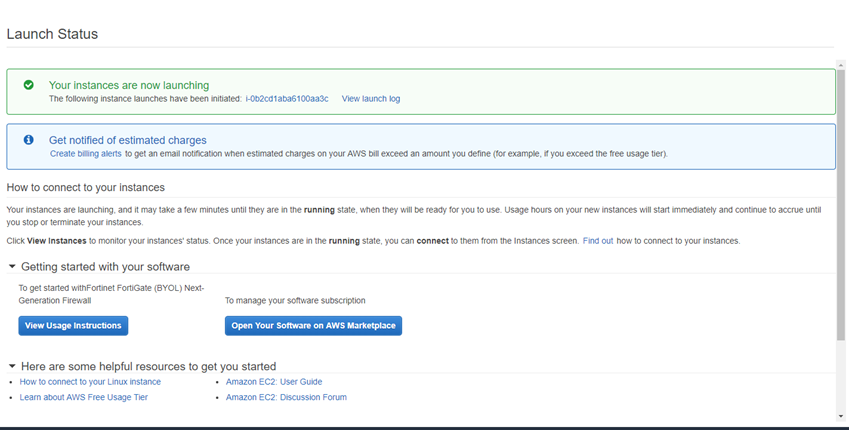
Step 9: The launch status will be displayed
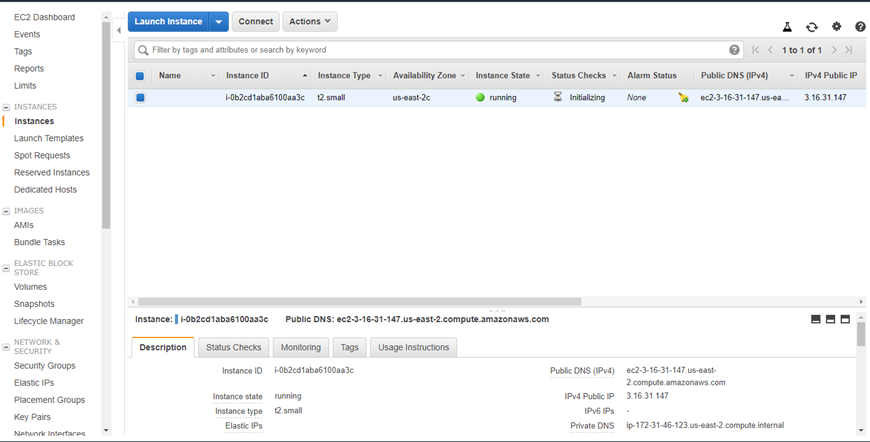
Step 10: Go to Instances to check the FortiGate's status.
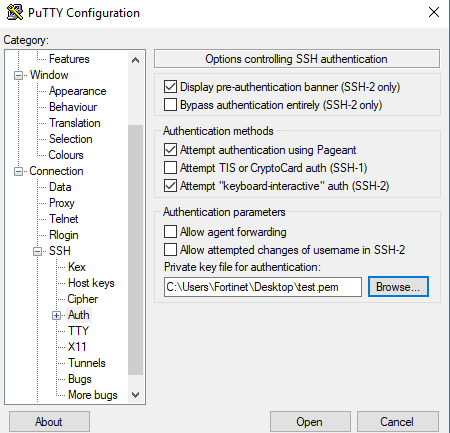
Step 11: Download the private key and import it with PuTTy.
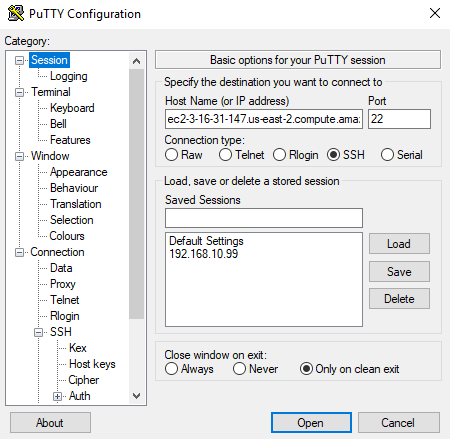
Step 12: Once the FortiGate instance state show “running”, connect to the FortiGate via SSH by using the public IP or Public DNS name.
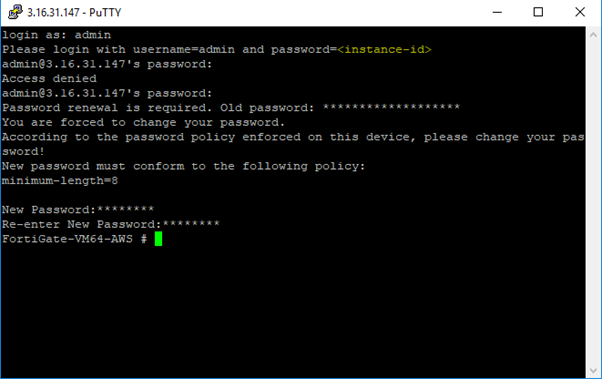
Step 13: For the first login to FortiGate the username will be “admin” and the password will be “instance-id”. It might be required to change the password.
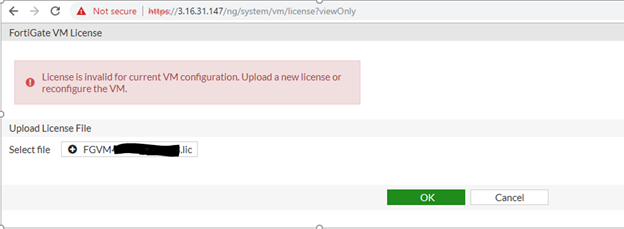
Step 14: Log in to the FortiGate GUI using the new password, it will then be required to select the license file.
Step 15: It is now possible to login to the FortiGate and configure it.