Description
This article explains how to allow a port on a FortiGate.
By default, the FortiGate firewall denies all traffic passing through it on all ports due to a pre-configured 'implicit deny policy'.
Scope
FortiGate.
Solution
To allow any traffic through FortiGate on any port, configure the IPv4 policy with the 'action' set to 'Accept/Permit'.
Below is an example of how to allow the RDP port 3389 traffic through FortiGate:
Step 1:
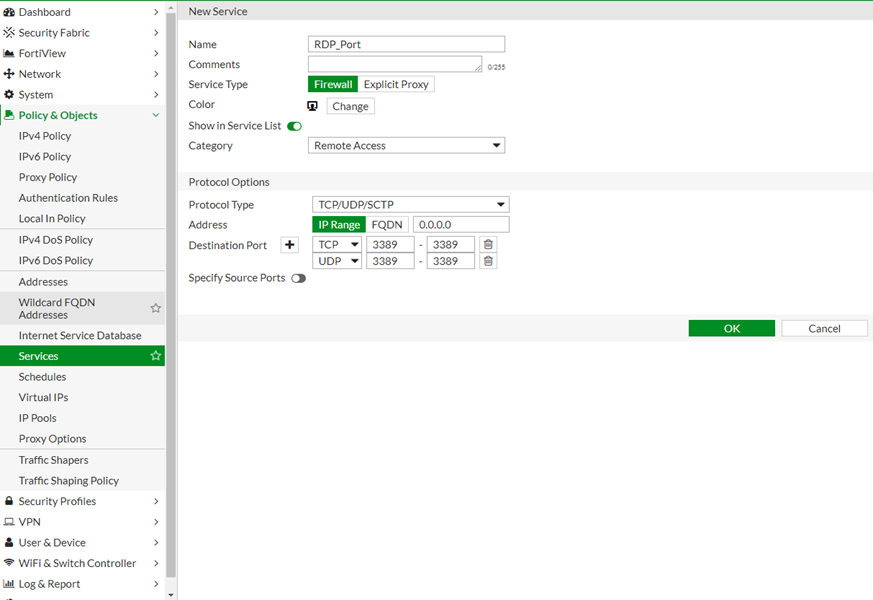
Create the 'Service' Object for port which needs to be allowed under Policy and Object -> Services.
If it is the standard port, there are predefined service objects under 'service list'.
If not, configure the 'Service' Object under Policy and Object -> Services -> Create New -> Service
Note: In this RDP example, RDP uses both TCP and UDP so both need to be added. If there is only a specific protocol, either UDP or TCP, only add that protocol with a port number.
Step 2:
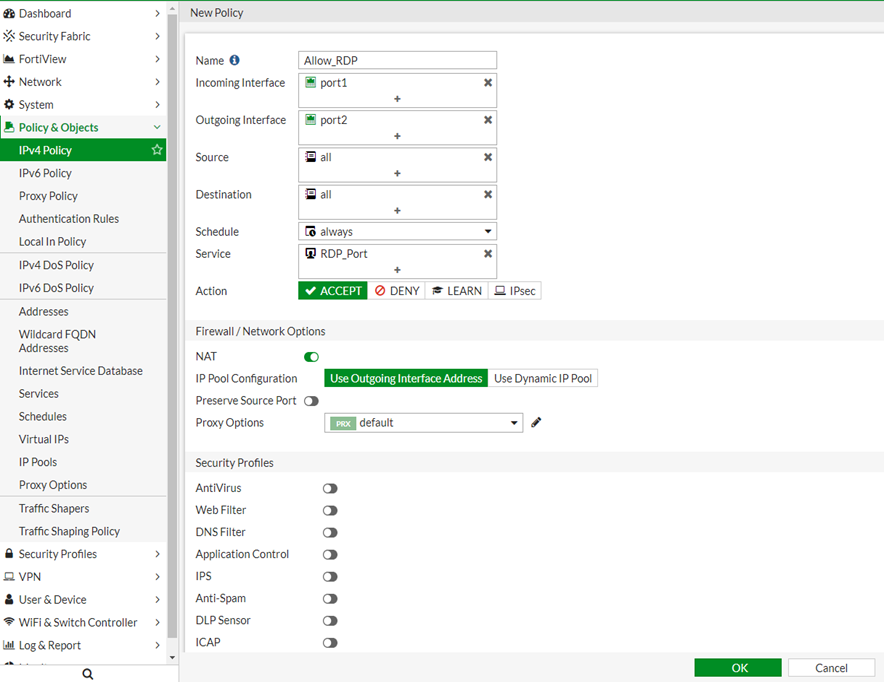
Apply the configured service object 'RDP_Port' under the 'Service' option of the policy configuration:
To create a policy, navigate to Policy And Object -> IPv4 Policy -> Create New.
To verify, run the sniffer as follows:
diagnose sniffer packet any "tcp port 3389 or udp port 3389" 4
interfaces=[any]
filters=[tcp port 3389 or udp port 3389]
1.427148 port1 in 10.143.3.189.64958 -> 10.5.41.48.3389: syn 2923297620 <- Packet enters on FortiGate Port1 (ingress).
1.427148 port2 out 10.143.3.189.64958 -> 10.5.41.48.3389: syn 2923297620 <- Packet is leaving on port 2 (egress).
Notes:
- Place this specific policy on top of all other general policies.
- If it is required to block the specific port, the steps are the same except with the 'action' set to 'Deny'.